Let’s discuss the question: how to make a screw on inventor. We summarize all relevant answers in section Q&A of website Countrymusicstop.com in category: MMO. See more related questions in the comments below.
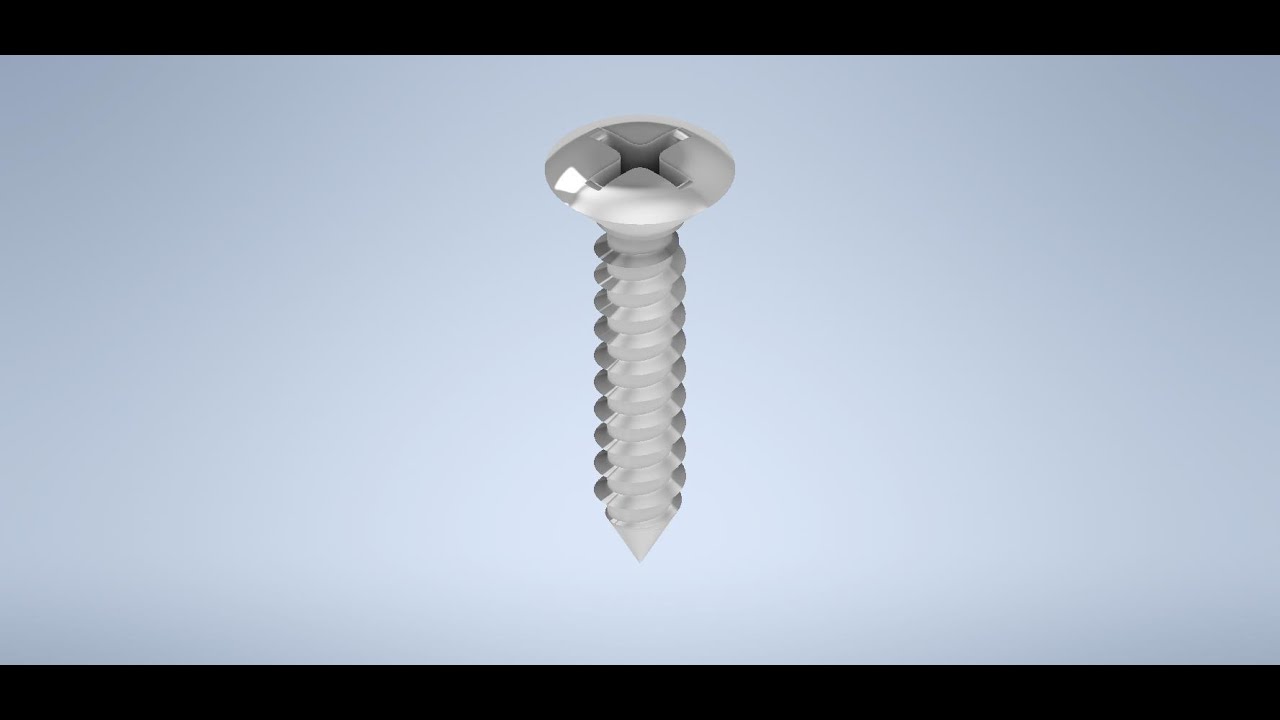
Table of Contents
How do you add screws in Inventor?
Select Click to add a fastener to connect to the Content Center where you select the component. Begin populating the bolted connection. Follow the instructions on the right side of the Design tab. Select Click to add a fastener to connect to the Content Center where you select the component.
How do I make a model thread in Inventor?
Select the threadModeler function from the coolOrange ribbon and select the thread you created in the Control dialog (select it in the modeling tree, not in the model itself). Select the thread template (ISO/BSW) and confirm with OK. A real 3D model of the thread with the given parameters will be modelled.
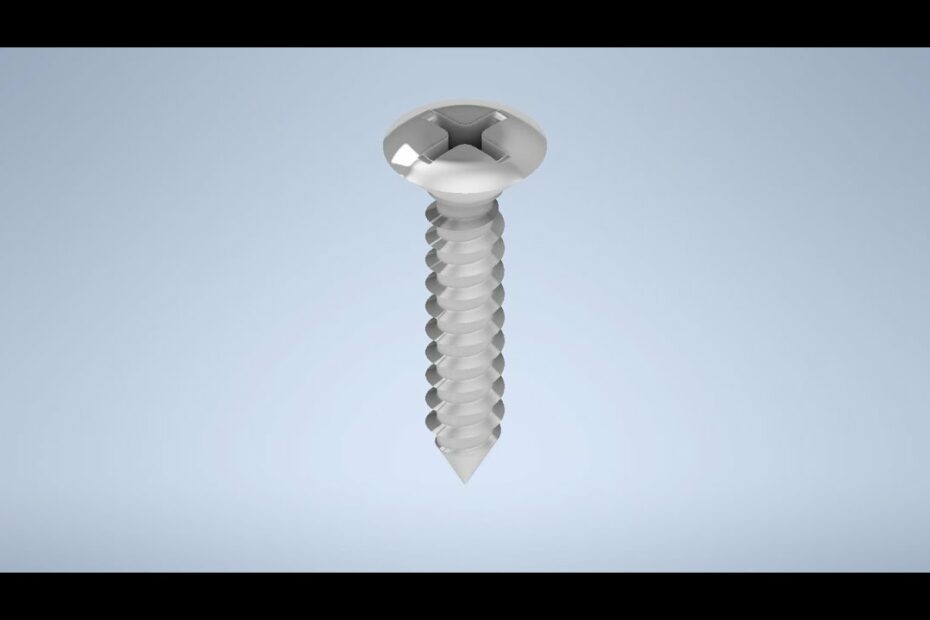
3D Modelling a Screw on Autodesk Inventor 2021
Images related to the topic3D Modelling a Screw on Autodesk Inventor 2021
How do you add hardware to inventor?
- On the Assemble tab Component panel , choose the drop-down arrow under Place to access the Place from Content Center command. …
- Expand the section titled Shaft Parts.
- Expand the sub-section titled Circlips, and select External.
- Select ANSI B 27.7M in the dialog box, and then choose OK.
What is use of coincident constraint?
The Coincident constraint causes two points to be constrained together, or causes one point to lie on a curve. In a 3D sketch, a coincident constraint can also cause points and lines to be constrained to surfaces.
How do you make a hex bolt in Inventor?
- Invoke a sketch in Inventor and make a polygon with 6 sides i.e., a hexagon.
- Finish the sketch.
- Extrude the profile to a certain limit.
- Click OK to finish extrusion.
- Right click on this plane and invoke a sketch.
- Sketch a circle->finish sketch.
- Extrude it.
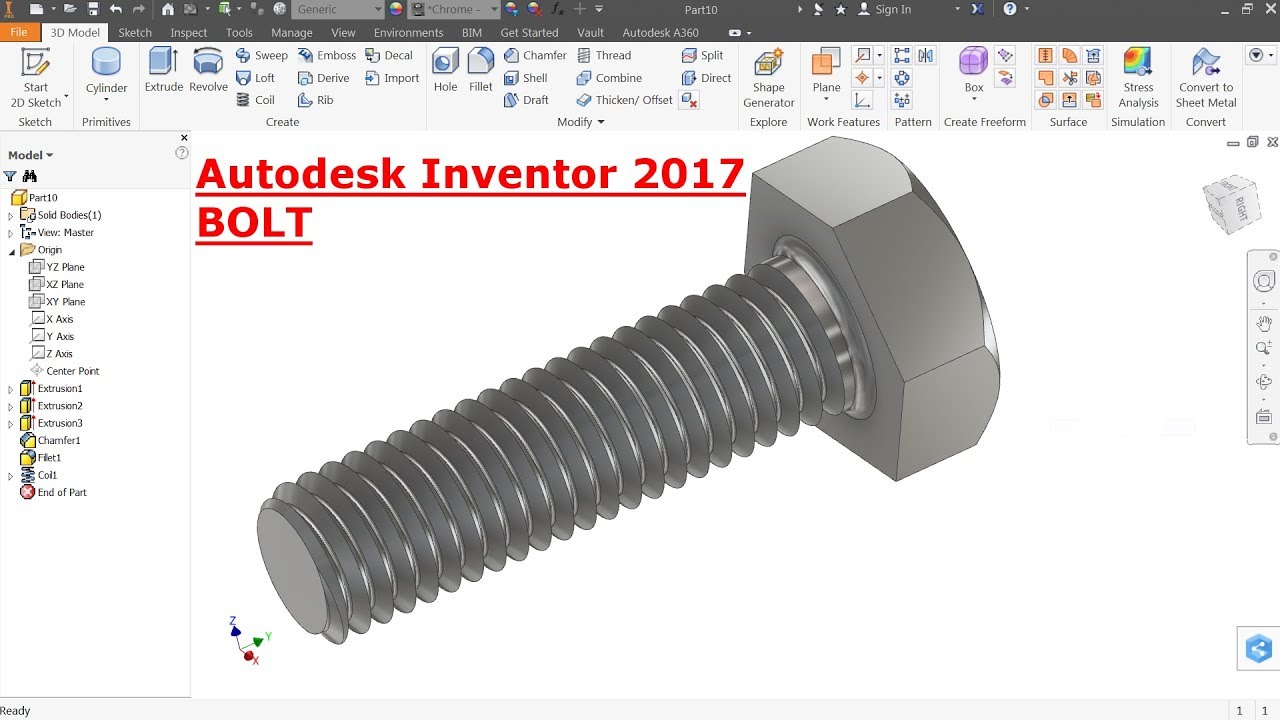
Autodesk Inventor Tutorial Bolt
Images related to the topicAutodesk Inventor Tutorial Bolt
How do I install cool orange thread modeler?
- Navigate to “Tools” -> “Options”
- Press “Add-Ins” to open the add-in manager.
- In the add-in manager select the “coolorange-ThreadModeler” add-in.
- Uncheck the “Block” checkbox.
- Check the “Loaded/Unloaded” and “Load Automatically” check boxes.
- Press “OK”
How do I access the Content Center in Inventor?
- On the Inventor installer landing page, click Autodesk Inventor Content Libraries.
- Click the down arrow and select the libraries you want access to.
- Click the up arrow to close and return to the product list.
What is use of symmetric constraint?
The Symmetry constraint command enables you to constrain two sets of entities in a 2D profile so that they are symmetric to each other with respect to a symmetry axis. The Symmetry constraint requires that the entities be input as 3 groups — First Group, Second Group and the Axis Line.
What is a tangent constraint?
Tangent constraints constrain an object’s orientation so that as an object moves along a curve, the object always points in the direction a curve. The curve provides the path of the object’s motion, and the object orients itself to point along the curve.
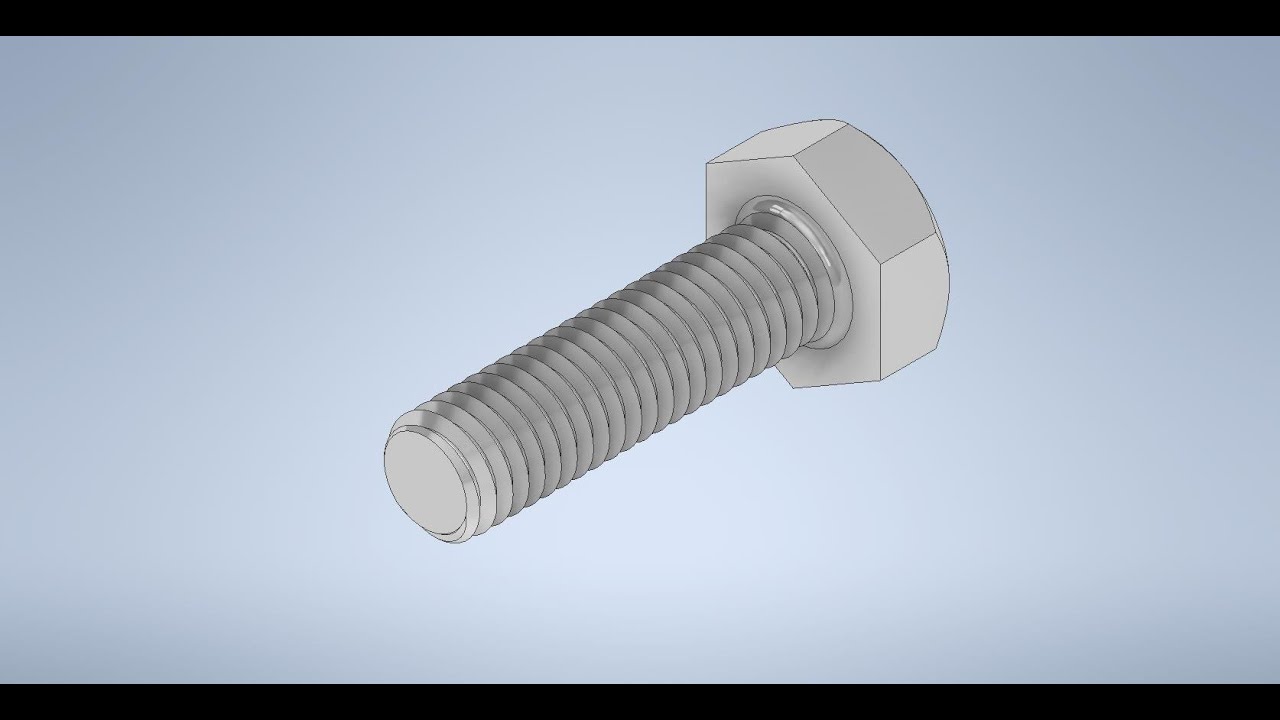
3D Modelling a Bolt on Autodesk Inventor 2021
Images related to the topic3D Modelling a Bolt on Autodesk Inventor 2021
How can you make sure a sketch is fully constrained?
A sketch is fully constrained when the size and position of all sketch geometry is completely defined.
How do you make a polygon in Inventor?
- Click Sketch tab Create panel Polygon .
- In the Polygon dialog box, choose one of the following options: …
- Enter the number of edges you want the shape to have.
- Click in the graphics window to set the center of the polygon and then drag to create the shape.
Related searches
- bearing inventor
- Bearing inventor
- Sheet metal Inventor
- how to make a screw up
- insert nut in inventor
- how to make a screwdriver on inventor
- coil inventor
- how a screw is made
- how to make screw holes in inventor
- how was the first screw made
- sheet metal inventor
- Pipeline inventor
- Assembly Inventor
- Insert nut in inventor
- assembly inventor
- how were screws invented
- insert bolt inventor
- Insert bolt inventor
- insert frame inventor
- how to make your own screws
- how to make a screw out of paper
- how to make a bolt and nut in inventor
- how to make a hex nut in inventor
- pipeline inventor
Information related to the topic how to make a screw on inventor
Here are the search results of the thread how to make a screw on inventor from Bing. You can read more if you want.
You have just come across an article on the topic how to make a screw on inventor. If you found this article useful, please share it. Thank you very much.